
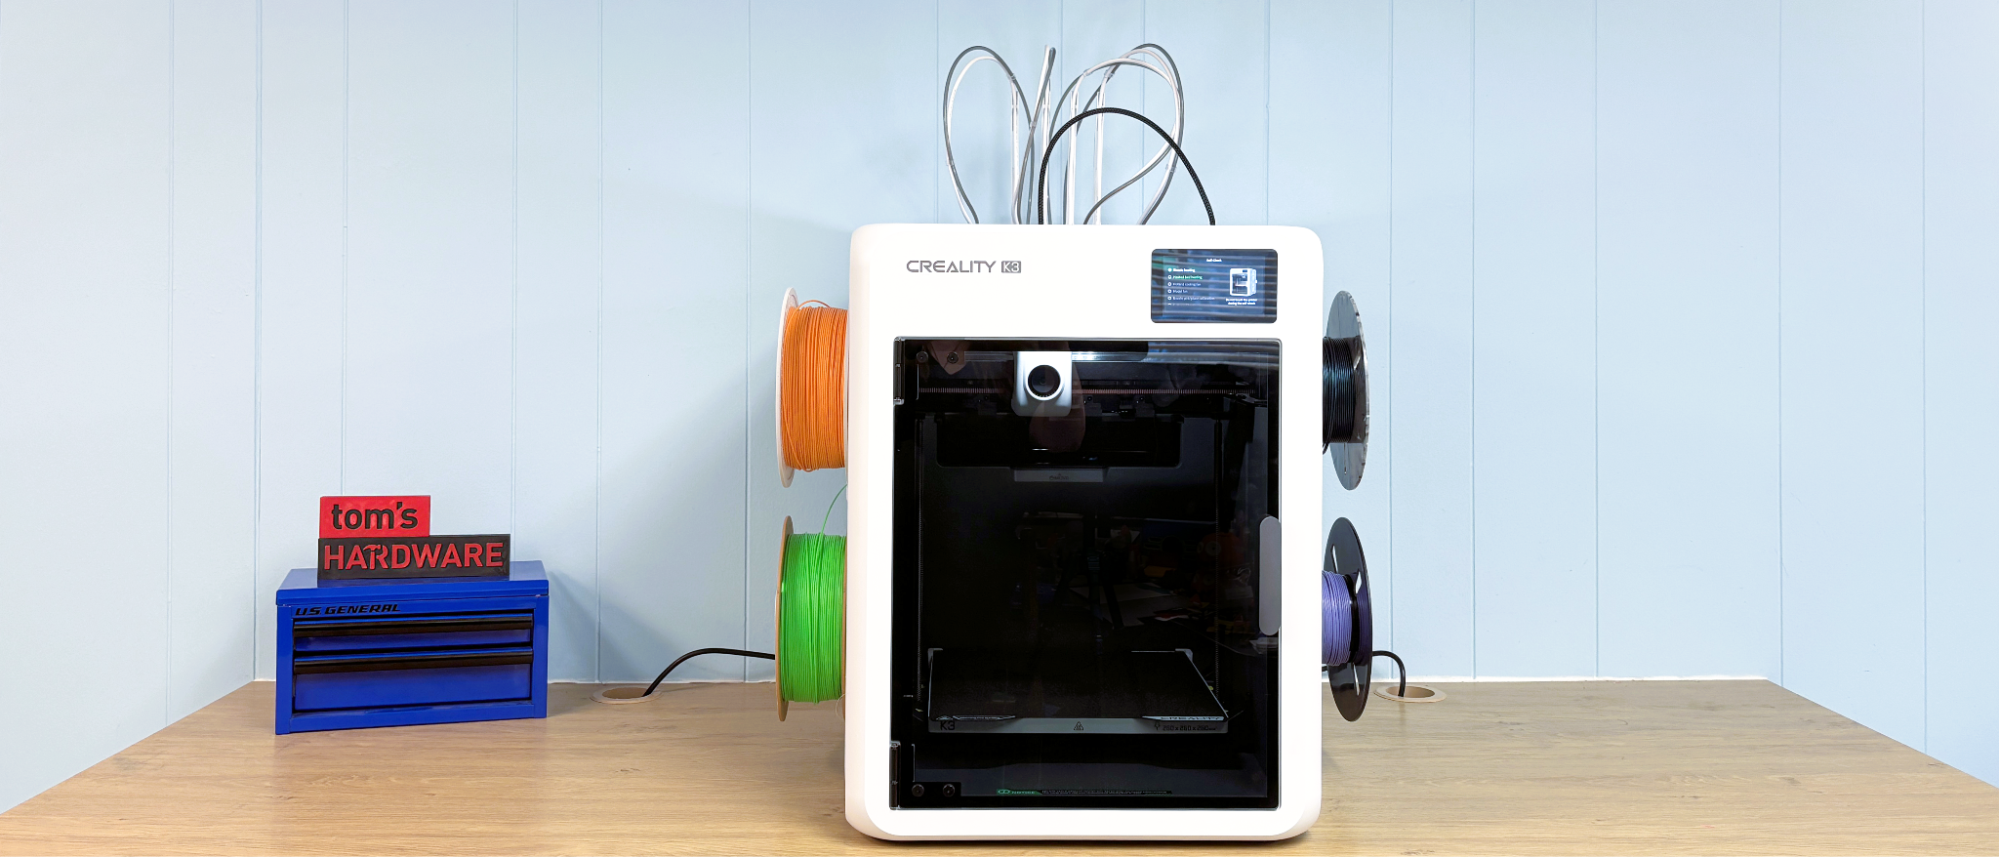
The Creality K3 has four tools, each with a built-in ceramic heater, nozzle with a hardened steel insert, and filament path. The KliTek system supports printing with different nozzle sizes and different materials in the same print. Like the Prusa/Bondtech INDX, the extruder and cooling fan are mounted on a single toolhead.
The rest of the Creality K3 shares its design with the K2. The printer has a solid metal frame clad in white plastic and a glass door with dampened hinges. The motion system is Core XY, with a linear rail for the X axis and linear rods for the Y axis. The bed rides on four linear rods driven by 2 lead screws belted to a single stepper motor on the bottom of the printer. Parts cooling is provided by a blower fan in the toolhead and a large side-mounted blower fan mounted on the left side of the case. The stock Creality K3 comes with an open top, so chamber cooling is not an issue. Unfortunately, this makes the printer rather loud.
The Creality K3 has a 720p camera located at the top right of the printer, which does a great job providing print monitoring from the device tab in the slicer and the Creality Cloud app. There is also an AI camera that monitors for build plate detection, foreign object detection, and spaghetti detection. There were no false positives during the test.
We did not get to review the special TPU kit, which will allow the machine to run super soft TPU, which is becoming quite trendy for those interested in printing shoes. The kit will replace the CFS Nano material handler with a CFS Flex and add dry boxes for the filament and a special high-flow nozzle. The kit will be bundled with a lid/ tophat with ventilation and air filtration.
The Creality K3 arrives with some assembly required. After removing the packing material, you need to remove the four screws securing the bed for shipping, and there is a nice reminder to do this when first firing up the printer.
The spool holders twist into the printer’s side panels and are numbered to match the filament slots. Two PTFE guide brackets, also numbered, need to be secured to the rear of the printer with M4x6 screws, as does the bracket for the CFS Nano. There is a communication cable that runs from the rear of the printer to the CFS Nano as well.
The tool cables attach to the top of the printer with 2 M4x12 screws each, with the PTFE tubes running to the CFS Nano. The toolhead communication cable is attached with M3x5 screws on the toolhead and M4x8 screws on the right side of the printer. Attaching PTFE guide tubes from the side brackets up to the CFS Nano completes the assembly.
The Creality K3 does an excellent job calibrating and bed leveling as part of its initial self-check. Bed leveling can be repeated at the start of each print.
Loading filament into the Creality K3 is pretty simple. Filament is inserted into a port on the side bracket, which guides it up to the CFS Nano, which does the rest. The filament waits in the tube until called for by a print job. It is then loaded into the tool.
To unload, the tool is selected from the printer’s screen. The printer then cuts the filament and retracts it out of the tool, and it can be manually pulled out of the CFS Nano the rest of the way.
All four filament slots can read RFID tags in the spools to load information for Creality-branded filament. For other filament brands, the printer will beep to remind you to manually enter the filament type and color.
The latest version of Creality Print 7.3 is available from Creality.com. It is based on the Orca Slicer and Ultimaker Cura Engine. The default settings worked well, and there is a new AI assistant mode, which is still labeled as beta. At the time of the review, the only thing missing for the K3 was a button to map the filaments into the slicer. The button is still there for the earlier K-series printers in the slicer. The slicer does have filament mixing for more color combinations.
The Creality K3 comes with a 200g spool of white Hyper PLA . If you want more colors and materials, you should check out our guide to the best filaments for 3D printing for suggestions.
For the first print, I was going to run a pumpkin fidget toy, so I grabbed a spool of Prusa orange and was really quite cross when it didn’t fit on the preposterously large spool holders. I decided right then to mod the spool holder with the Creality Pika scanner . I took the scan into Tinkercad and reduced the diameter of the spool holder, then ran the new spool holders in Inland basic white using a .2 layer height and an average print speed of 170mm/s. The print took 8 hours and 34 minutes to complete. I do not usually mod printers while reviewing them, but Prusa Orange is perfect for pumpkins.
Below is the original spool holder (left) and the modded version (right).
Key considerations
- Investor positioning can change fast
- Volatility remains possible near catalysts
- Macro rates and liquidity can dominate flows
Reference reading
- https://www.tomshardware.com/3d-printing/SPONSORED_LINK_URL
- https://www.tomshardware.com/3d-printing/creality-k3-review#main
- https://futureplc.com/privacy-policy/
- Nvidia Brev security breach may have exposed SSH keys used to access customer VMs
- Putin demands Russian data centers supply capacity to the state in wake of Ukraine drone attacks
- AI agent used to perform controversial brain surgery on a mouse, Anthropic Sonnet controlled motorized surgery rig
- AI agent swarms unleashed in Minecraft to ‘build a thriving civilization’
- Google Cloud and NVIDIA Announce General Availability of NVIDIA Vera Rubin Infrastructure
Informational only. No financial advice. Do your own research.